Home Slide
| CSS Wrapper Class Name: hero-slide make-buttons bg-image |
| Style |
 |
<h4>Upcoming Webinar</h4>
<h2>Diabetes Throughout the African Diaspora</h2>
<p><em><a href="#needsLink" target="_blank" rel="noopener">Regular Button</a></em></p>
<p><img src="https://higherlogicdownload.s3.amazonaws.com/THEACADEMY/ba00525c-8b3b-4dde-a1c4-a521e0763456/UploadedImages/theme-1/hero-img.png" alt="" data-mce-hlimagekey="acd8cc63-6f94-b6d2-7ed2-19a20d441834" data-mce-hlselector="#TinyMceContent_d1f7734d-859b-9a93-cf11-643db7eb72d3-tinyMceHtml" /></p> |
How To...
- Add an Html Content Item to the first row
- Add the classes hero-slide make-buttons bg-image to the content item
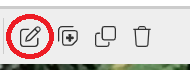
- Click the pencil icon
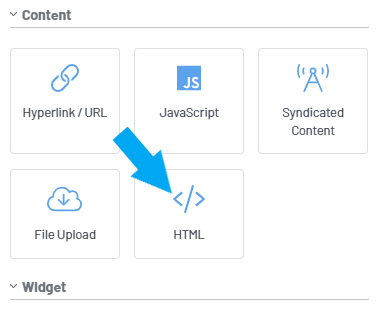
- Edit the Content Item and Select the HTML Button
- Paste the HTML Sample Code Above in the Window Select "Ok"
- Edit the Html Content using the WYSIWYG Editor Tools.
- Click Save
Full-Width Banner with Link
| CSS Wrapper Class Name: hero-slide no-background image-slide bg-image |
| Style - Header Only |
 |
<div class="slide-image-link" onclick="window.open('https://www.eatrightpro.org/events/fnce','mywindow');" style="cursor: pointer;"> </div>
<p><img src="https://higherlogicdownload.s3.amazonaws.com/THEACADEMY/dc92ffa4-26cc-486a-8449-32de82c8d9e7/UploadedImages/DPG_MIGs/Academy_Banners/FNCE/FNCE24_Banner_1263x400_v1_Practice.jpg" alt="" data-mce-hlimagekey="acd8cc63-6f94-b6d2-7ed2-19a20d441834" data-mce-hlselector="#TinyMceContent_d1f7734d-859b-9a93-cf11-643db7eb72d3-tinyMceHtml" class="img-responsive"></p> |
How To...
- Add an Html Content Item

- Add the classes hero-slide no-background image-slide bg-image to the content item
- Click into the HTML Content section and select the "Edit" icon

- Select the HTML Button
- Paste the HTML Sample Code Above in the Window
- Replace the link in the code (highlighted below) with your URL
- <div class="slide-image-link" onclick="window.open('https://www.eatrightpro.org/events/fnce','mywindow');" style="cursor: pointer;"> </div>
- Select "Ok"
- Update the background image
- Click "Save"
Right-Hand Side Image Banner
Image will line up on the right side of the content.
| CSS Wrapper Class Name: hero-slide hero-right-image make-buttons bg-image |
| Style - Header Only |
 |
<h4>Developing Leaders</h4>
<h2><strong>Academy Elections:<br>Call for Nominations</strong></h2>
<p>The Academy is seeking dynamic and visionary leaders who are ready to make a meaningful impact and be a part of this exciting journey towards a bright future for our Academy.</p>
<p style="text-align: left;"><em><a href="https://www.eatrightpro.org/leadership/developing-leaders/nominations-and-elections" target="_blank" title="Learn more about the Academy's Nominations and Elections" rel="noopener">Learn More</a></em></p>
<p><img src="https://higherlogicdownload.s3.amazonaws.com/THEACADEMY/859dd171-3982-43db-8535-56c4fdc42b51/UploadedImages/global_files/Election25_1200x675.png" alt="slider-bg.png" data-mce-hlimagekey="acd8cc63-6f94-b6d2-7ed2-19a20d441834" class="img-responsive" data-mce-hlselector="#TinyMceContent_d1f7734d-859b-9a93-cf11-643db7eb72d3-tinyMceHtml"></p> |
How To...
- Add an Html Content Item
- Add the classes hero-slide hero-right-image make-buttons bg-image to the content item
- Click into the HTML Content section and select the "Edit" icon
- Select the HTML Button
- Paste the HTML Sample Code Above in the Window
- Select "Ok"
- Edit the Html Content using the WYSIWYG Editor Tools
- Click "Save"
Additional Notes
There needs to be at least 2 html content items for the slider to run without two the slider will not be enabled and the Hero-slide content item will appear as a static Component